
Table of Contents
If you are looking for a painting design for your nails, then you are in the right place. As we know, art on your own nails at home can seem next to impossible, but luckily, there are top nail designs out there that pretty much anyone can paint. We curated the 20 best designs that are trending and fashionable, in addition to being easy to make.
Besides, we know that nail art for short designs is quite hard to create, and the elegant style makes your nails look even chic. But luring these easier trendy nail designs for short nails will propel you to create them. If you are scrolling through this blog, you get the stylish nail art design that is amazing for your short, cute nails and can look forward to home arts for nails without being scared.
Top Short Nail designs 2023
Here, you can get the best tips for easy nail designs for short nails.
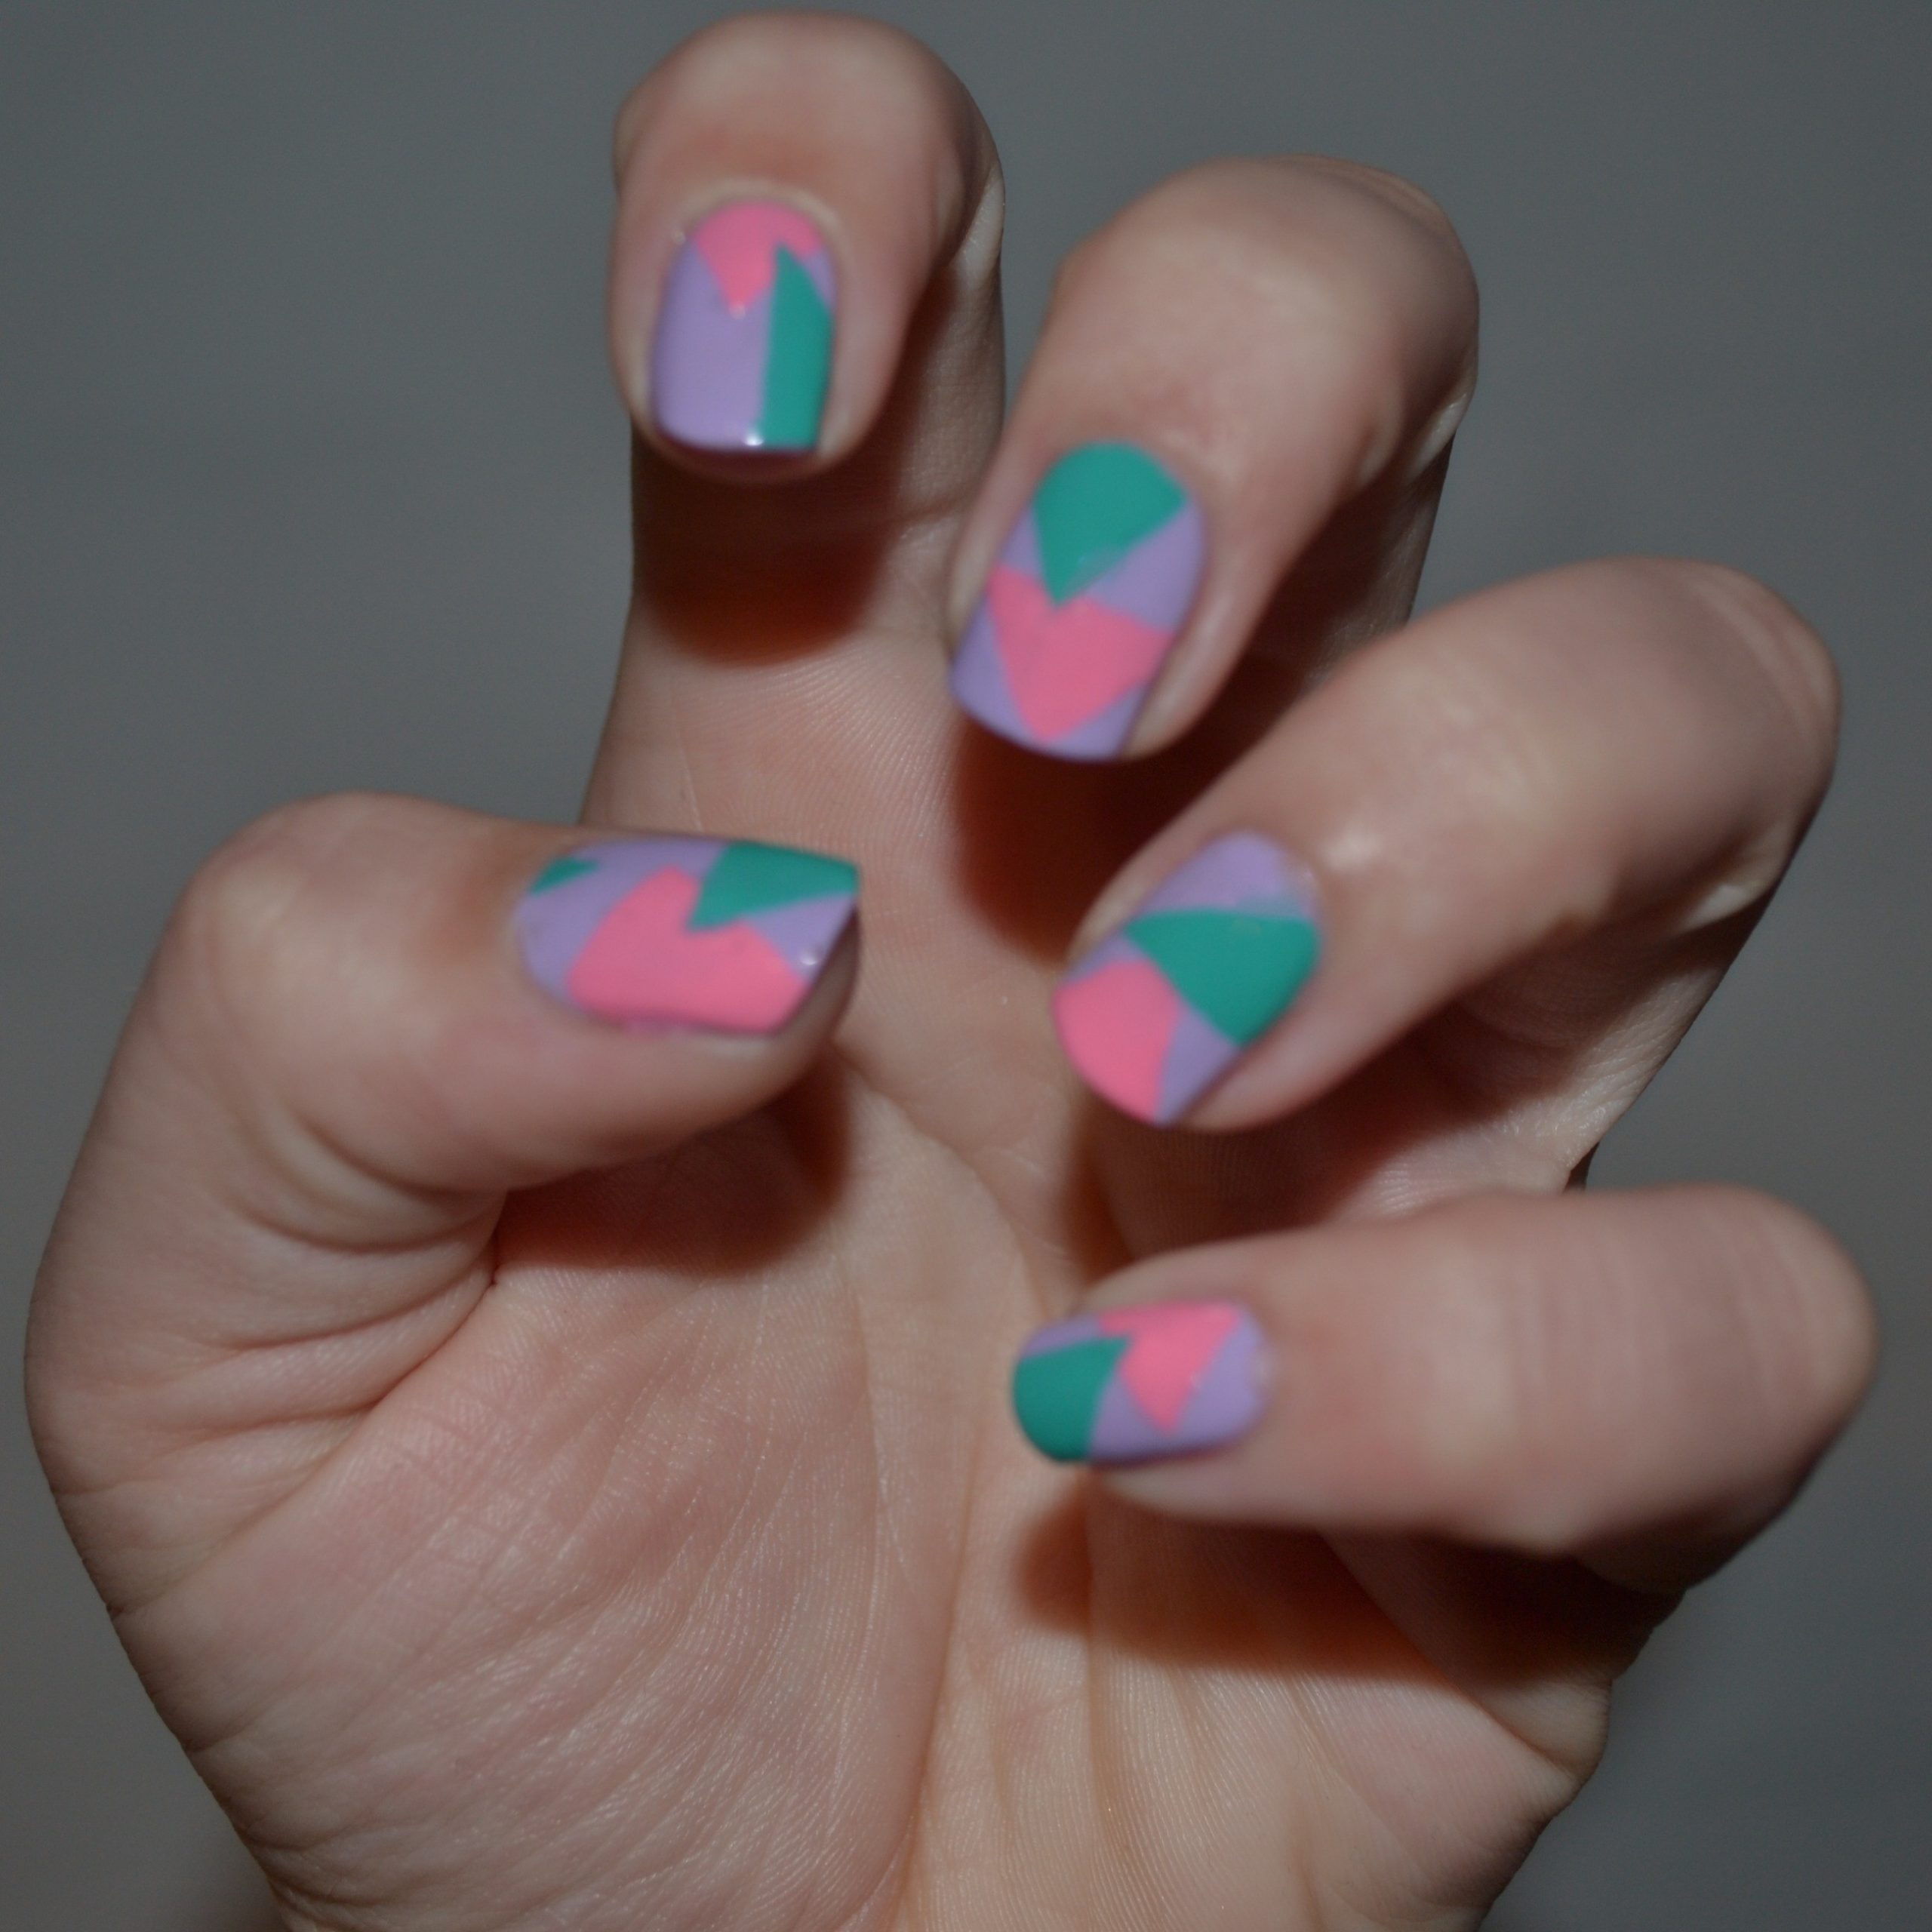
1. Graffiti Nail Art
The graffiti nail design is very fashionable, and the patterns used give you a very smart and elegant look. This nail design reflects the hip hop of love and makes your appearance trendy and classy. Hence, draw this funky graffiti short nail art design and get numerous compliments. Nowadays, this design is popular in fashion and is colorful and appealing in its appearance.
Preparation Instructions
Graffiti classy short nail designs are quite easy to create. And you don’t need to get special tools for it. To draw this graffiti nail art design, wipe off excess nail polish with a brush and swipe random stripes on your dark-colored nails. However, you can use a combination of colors to make your nails look more attractive.
Safety warning
Don’t use anything flammable while creating graffiti nail art.
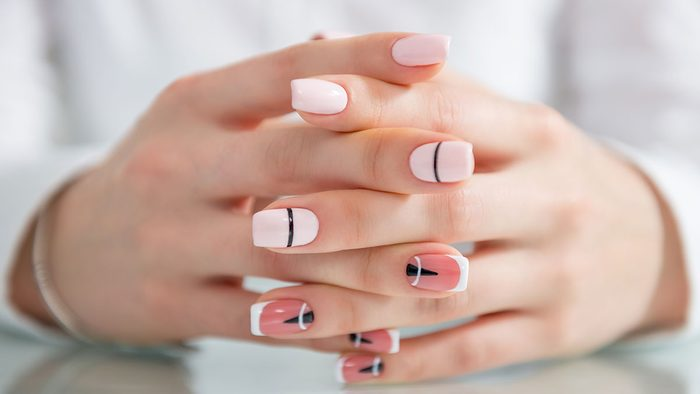
2. Pinstripe Nails Art
This easy pinstripe pretty nails short design needs the nail striper in addition to your nail polishes. You can choose any color after painting the white on the nail. In such a way, you can easily create pinstripe-gorgeous nail art.
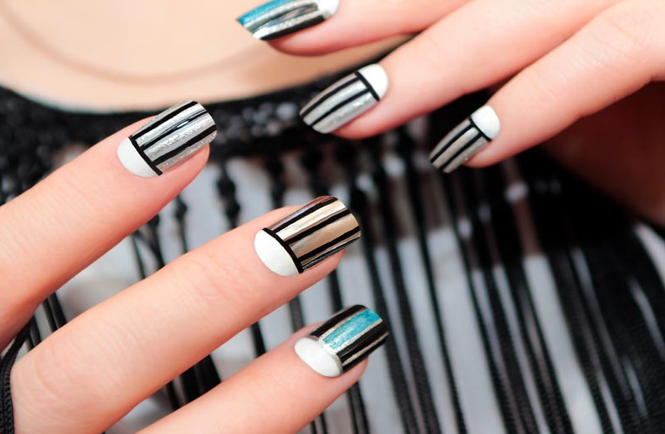
Preparation Instructions
First and foremost, you have to polish your nails white color. And, after equipping them with white paint, users can choose any color to make thin stripes on their white nail polish. If you want to make an advanced design with an alluring structure, you can use different colors for your different nails. But try to make sure you are using pastel colors so that it looks aesthetically pleasing.
Safety Warning
First, you must let your white paint dry, then create stripes over it.
3. Delighted Dots Nails Art
This art offers you a good chance for your hairpin. Because every time you remove a bobby pin from your hair, you leave it on your bathroom counter, and it knocks on the floor, never to be seen again. Instead, pull the two ends of it as far as you can and turn it into a makeshift tool for dotting.
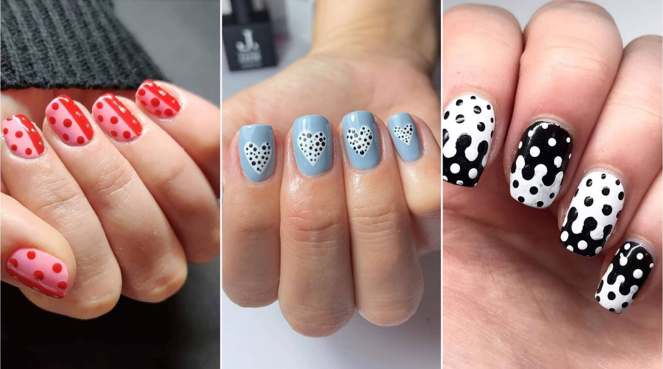
Preparation Instruction
You should dip its beads into your choice nail polish bottle until they’re lightly coated, then use that to gently polish onto the nails dot by dot. Simply put, apply a base coat to your nail and let it dry. After that, paint your thumb and fourth finger with the lighter polish and cover your other finger with dark polish. Thereafter, apply the second coat, according to your need, and eventually get complete coverage. Let the polish dry between coats on your nails.
Safety Warning
If you find your nail art is perfect with the base coat, don’t apply the second coat.
4. Pink Autumnal Nails Art
Fall is that time of year when the whole season turns around, as well as your nails. It’s all about choosing a less common shade and adopting a new color update that’s a real headliner. So without delay, let’s look at the process of pink automnal nail art.
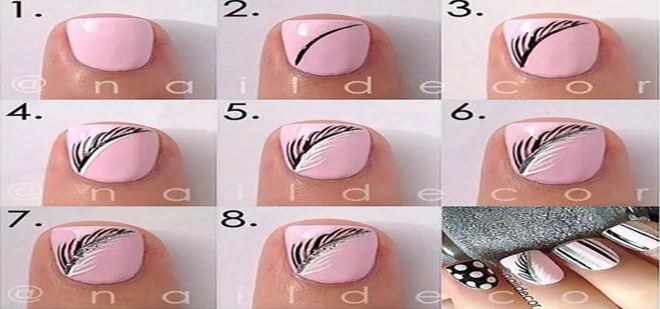
Preparation Instructions
It is one of the best design among cute nail designs for short nails. You need pestel pink nail polish for your base of this design, then use the black paint on a nail striper. And create the one-sided leaf on your ring finger. After that, apply the white nail paint on the other side of the stem and create the same leaf. Moreover, to make it more impressive, you can swipe on some silver glitter where the white and black spots are created on your nail.
Safety Warning
While making the strips for this nail art design, don’t mess them all together.
5. Heart Inception Nail Art
Heart Inception nail art is a pretty design for short nails. Almost every girl is likely to create this kind of art on her nails. However, it’s an easy process, and as per the name, you only need to draw the heart with nail paint.
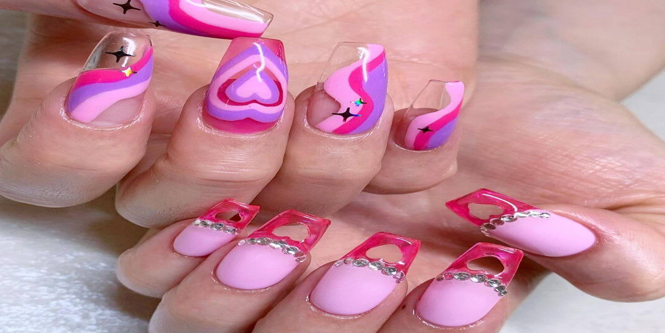
Preparation Instructions
Spread the love by making hearts on your nails. First, apply the pink color to the base. After that, lay the shades of white and draw one heart within another to create the heart-shaped Inception nail.
Safety Warning
Use the red and pink color because only these colors produce the exact heart shape.
6. Half Moon Nail Art
The half moon is a classy glamorous short nails art design because it is prevalent for impeccable nail lengths and shapes. In simple words, it is putting a color on or underlining that should be round and small at the base of each nail, otherwise known as the lunula.

Preparation Instructions
To achieve this half moon cute easy nail designs for short nails art, then look forward. And first you have to use two complimentary nail colors, and reinforcement stickers, as well as likely, a little glitter. Once you create your desired art, simply finish it off with your top coat. You can also try this for solar nails, as they are in style this year.
Safety Warning
You should create a clear shape as your art appears in a moon shape.
7. Colorful Stripes Art For Short Nails
If you are looking for easy cute nail designs for short nails then creating colorful stripes is the best art for you. These colorful stripes trick captivate the eye. So even if you keep the short nails, they will appear lengthy. Use the different nail polish colors and let your nails be beautiful.
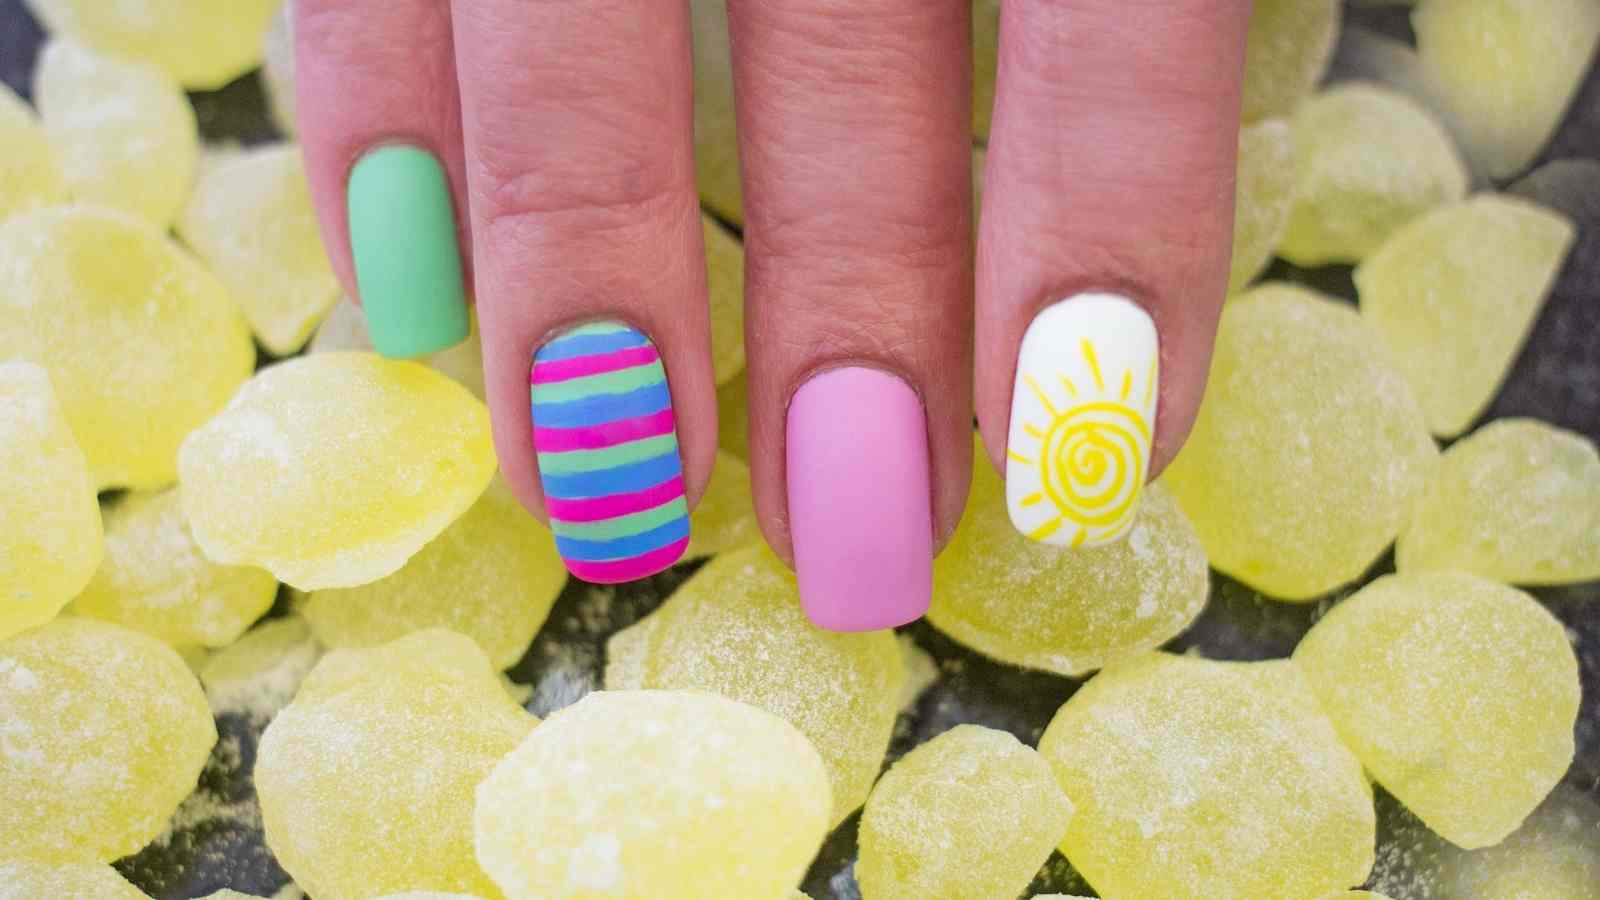
Preparation Instructions
You can easily create colorful stripes for your short nails. Initially, you have to paint any color for base, then create the stripes by using a different brush with different sizes. Apart from this, I have one pretty idea, if you are not perfect at drawing the stripes, you can use tape to make the lines straight and elegant.
8. Geometric Nails Art
Geometric nails allow you to match and mix a variety of multiple colors and patterns so that your nails are always looking gorgeous. It is one of the most passionate idea among the best short dip nail ideas. However, this art is made with almost infinite combinations and possibilities.
Preparation Instructions
Paint your nails in geometric patterns. So first you have to make the base, then use the different colors to create the geometric shape. You can also help with the tape while creating the geometric pattern. Therefore, cut up strips of tape and stick them on nails. However, you can easily create geometric shapes. Paint over it, remove the tape, and finish with a coat. You can also use various colours to add a pop of color.
Safety Warning
Use the different colors so anyone can easily identify the geometric shape.
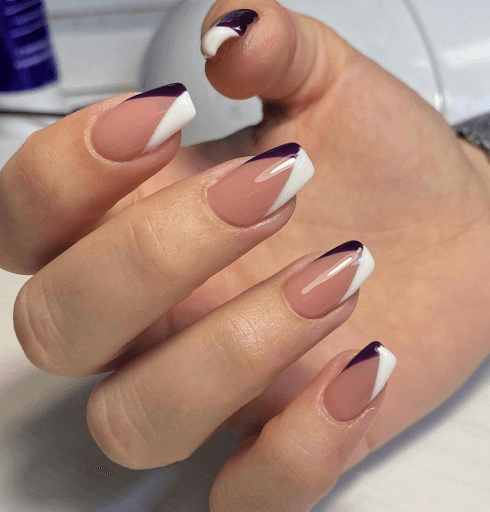
9. Triangle-Based Nails Art
It is the one of top art among nail fade designs. In the simplest terms ,the latest nail art trend is triangle designs. This art can be suitable for short nails as well as long nails. This easy design can reflect your fashion sense. Triangle art is a kind of nail art that will make you a fashionista.
Preparation Instructions
You can start this triangle nail art with a nude base. Once your base is dry, you can create triangles with natural-striped stickers. Now, using the same brush, fill every triangle with different colors. After making this art on your nails, carefully remove the stickers and seal with a top coat. In such a way, you can get triangle nail art on your nails.
Safety Warning
Use the good sticker, as you don’t need to put in the extra effort to stick and remove it.
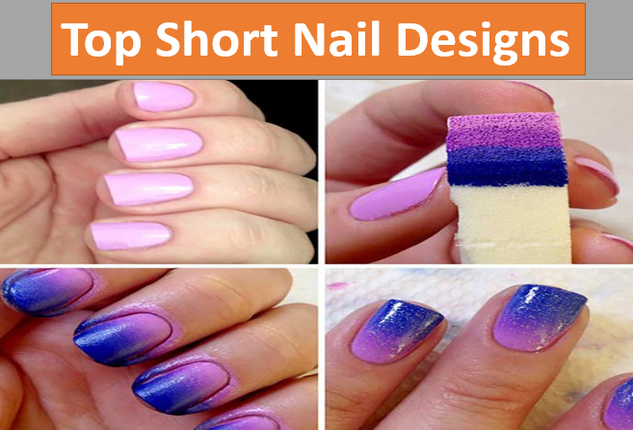
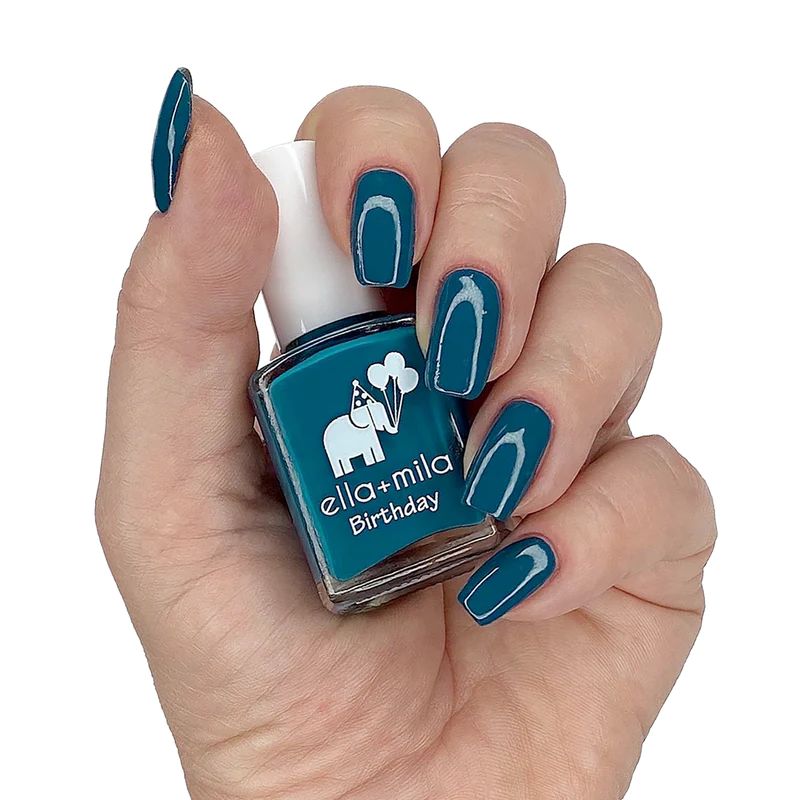
10. Blue Gradient Art
It is one of the pretty idea among easy nail ideas for short nails. Blue gradient art is the combination of blue and white. You can create it easily by following some easy steps. You can find this art seductive and get the appreciation to create it.
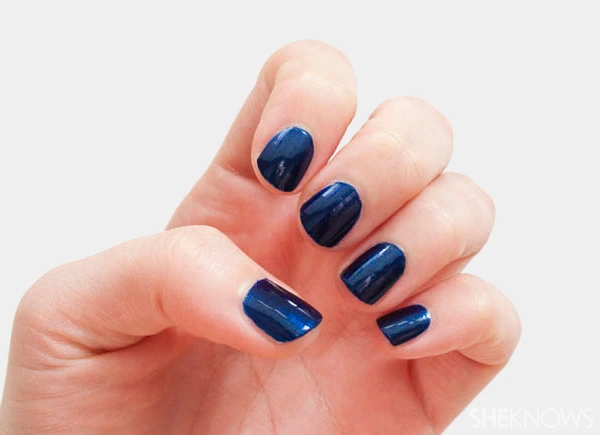
Preparation Instructions
Start off by painting your nails white. On a surface that won’t absorb liquid, there is a drop of water in the blue polish. Mix it up and apply it to most of the nail, leaving the space around the cuticle. Do this process again with three or four drops of polish and water. Eventually, apply the polish directly to the nails, and you can get a blue gradient nail art design.
11. Parisian Nail Art
Parisian nail art is known for great design out of the major attractive trendy short gel nail designs. Before doing this art, you should wash your hands and remove the old polish from your nails. Trim your nails to an even shape and length with a nail file.
Preparation Instructions
If you are interested in creating the Parisian nail design, you will need two polishes, including black and pastel peach. And now paint all your fingernails except the two. These nails you have to create with a black base and polka dots of peach color.
12. Speckled Out
You can curate multiple nail polish designs for short nails, but this is one of them. These colorful polka dot nail art designs are so aesthetically pleasing and fun. You should not use this kind of art in a professional environment, but if your workplace is creative, then enjoy this art and get compliments.

Preparation Instructions
Paint your nails with any color for the base (on alternative nails). Let the base dry once, use the opposite hand to draw small specks, and there you go.
13. Wild Flowers nail Art
Wildflower nail art is one of the most popular of all the different nail designs. It is a pleasant nail art manicure because it appears like you have spent your free time on it but is in fact quite easy to draw.
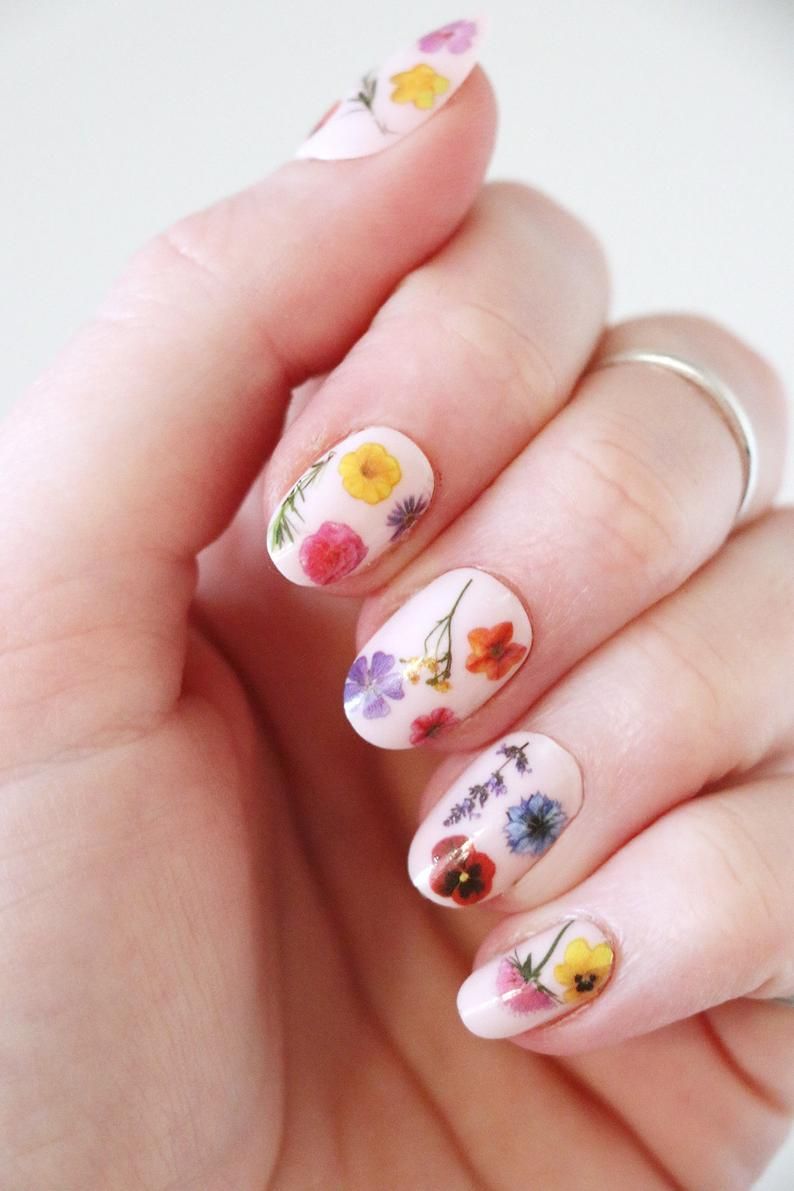
Preparation Instructions
You have to start your wild flower nail art by painting your nails and first applying the base coat. Then do the painting for the flower. For this, create the stem once, then use tiny strokes along the lines to create flowers in various shades of different colors.
Safety warning
Use the different colors for precision in the painting on your nails.
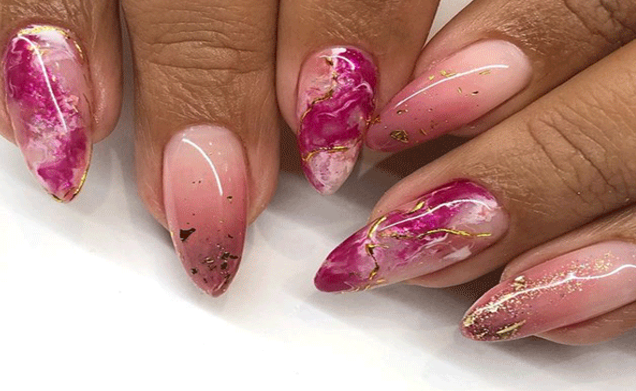
14. Geode Stone Nails Art
If you keep short nails, then geode stone nails are most suitable for your nails. Polish for the base once. After that, while applying each shade in gradation, dilute each shade in water to create the geode stone effect. Finally, you can get this elegant and mesmerizing nail art.
15. Glitter Fade Nails Art
This glitter fade nail art emits pleasure among the people due to its graceful look. It is pretty, simple, and elegant. You will need a gold glitter polish and a peachy shade for creating it.
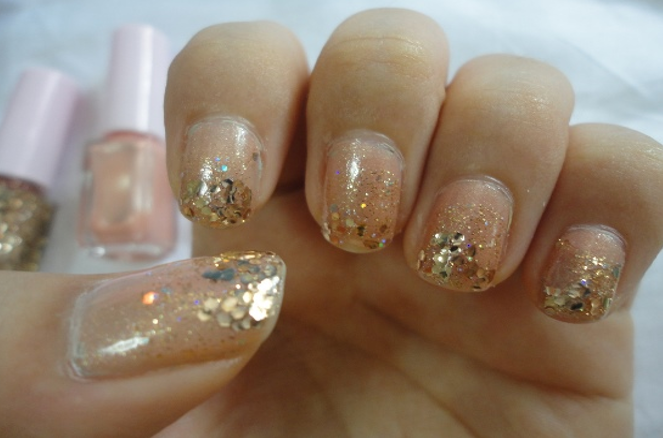
Preparation Instructions
Use any color as the base for this glitter fade nail art. Then, apply the gold polish on the cuticles. After that, you have to lightly swipe the glitter toward the nail center with a little glitter on the brush. You can use a nail stripper for more precision.
Safety Warning
Prefer the base color white or light as you can clearly show your glitter on your nails.
16. Fizzy Fun short Colorful Nails Art
If you most like the pebbles in the pond and want to create something like that, then you need to use this nail art and enjoy your nail art.
Preparation Instructions
For this design, you need two different brushes because of the different-sized dotting. On a base of dark green-blue, create multiple dots with 2 different brushes and gold with the tools of your choice.
Safety Warning
Don’t mash all the dots together; keep the gap in it.
17. Gingham Accent Nail Art
Gingham Accent nail art looks charming and they are easily created. Therefore, people most prefer to make it and enjoy it with their stylish nail paint.
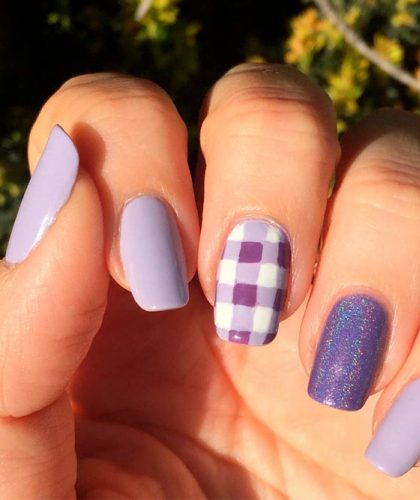
Preparation Instructions
Create it with the help of the tape. Take the tape according to your nail shape and paint any color that you like on it. After that, chop it into stripes and place them in a checkered fashion. Finish it off with a top coat over it.
18. Third Time’s A Charm
This pretty nail short art design is perfect for summer and spring. You’ve probably tried two nail colors when you do nail art, but there is an art to using three colors, so go ahead and give it a shot.
Preparation Instructions
All you have to do for this look is make stripes with each different color. It’s a simple process to do. And you can choose your three favorite colors from the painting color palette. Finally, you can get the super complements.
Safety Warning
Choose a different color for three strips that will not be similar.
19. Glitter French Art for Short Nails
I’m pretty sure if you’ve looked at the glitter French nail art, then you most likely like it and have tried to make it. If you are a beginner in nail art, then you can also create this design as long as you follow the guidelines.
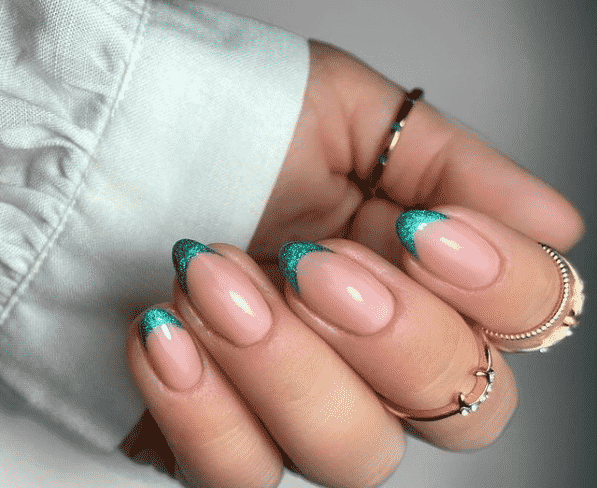
Preparation Instructions
To achieve this glitter French nail art, use the black polish as a base for this art. Once it dries, use the tape on the nails and apply a silver polish at the starting point of the nails (top). After that, remove the tape and seal with a top coat.
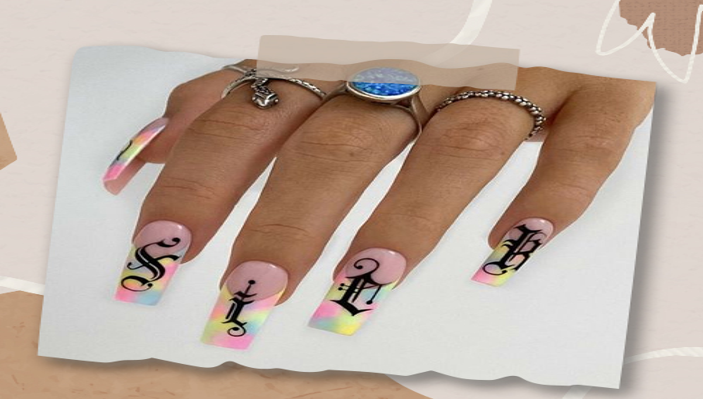
20. Rainbow Nail Art
This is the easiest and most impressive cute short nail designs that you may also do even if you are an amateur. It’ll take barely any time.

Preparation Instructions
Paint the nails white for the base of the rainbow nail art. After that, use your hairpin, a pointed q-tip, or a toothpick to create small dots to create this art. Note: Paint different rainbow colors on different nails. And now, find your nails with rainbow art.
Safety warning
If you want to create rainbow nail art, choose only rainbow colors.
I hope this blog is informative for you. For further details about nail art design, stay tuned with us.